


By Kenzie Kozera
First and foremost, for those unfamiliar with tube flies, they are exactly as they sound… flies tied on tubes. These tubes can range in length, diameter, and materials (plastic pens and snipped q-tips have been used by anglers). The basic anatomy of a tube fly involves:
- The body - The main tube portion of the fly where you will tie the body.
- The hook - Tied onto your leader after the line has run through the center of the tube.
- Junction tube (when needed) - Which secures the hook onto the rear of the fly. This is not needed when using soft plastic or scandi tubes in the 3.0mm diameter, as the rear of the body will act as a junction in which most hooks will fit.
For the sake of simplicity, as different regions have differing regulations and restrictions on gear, I will focus on the use of plastic (rigid or flexible) tubing during this article.
WHY USE TUBE FLIES?
Adaptability:- Weight (when legal) - You can use weighted metal tubes or weighted cones/discs to add weight to a fly, while maintaining the same profile as an unweighted version.
- Hooks - You have the ability to use smaller and shorter hooks. This is beneficial in a few regards, such as causing less damage to fish than using large gaped hooks and having improvements to the leverage of the hook when fighting a fish, as compared to a longer shanked hook.
- Due to the body of the fly often dislodging from the hook and being able to slide up the line, tube flies can often have a much longer lifespan due to not being “chewed” on in the mouths of fish. Also, if a hook dulls, it can be swapped without having to necessarily change out the fly.
- Variability of profile: Need a shorter body? Need a very long body to address those “short takes”? This is entirely up to you as the fly tier when either cutting your plastic tube or choosing your metal or hybrid tube size.
TUBES
Choose what type or size tube you are looking to tie on (remember, not all fisheries allow weighted tackled).
- Plastic or Scandi tubes
- 1.8mm - Typically used as liner tubes inside a 3.0mm when using a “step down” method. However, these are also used as the main body of a fly if you wish to use junction tubing and are able to maintain a thinner profile of flies.
- 3.0 mm - Your typical sized tube use for a variety of fisheries. If requiring it to taper to a smaller head, the step down method can be used. Depending on the material, if using a flexible plastic, your hook can be lodged in the rear without using junction tubing.
- XL Tubes - These come as large as 5.0mm and are typically geared towards large predator species such as musky or pike. Personally, this is outside of my wheelhouse and I have never needed a larger profile than that of a 3.0mm.
- Metal Tubes - These come in a variety of different lengths, thicknesses, shapes, and densities (ie. tungsten vs copper). These will typically require the usage of junction tubing, as the body will be too rigid to attach your hook directly.
- Hybrid Tubes - Exactly as they sound, they utilize both plastic and metal. Typically, these will be a metal tube with a plastic liner, allowing for a tapered profile and smaller head.
CONES AND DISKS
*Review the regulations in your region regarding the use of these, as not all permit.
1. Cones : As with many other styles of flies, the use of metal or plastic cones may be used to add weight to the front of tube flies. This will impact the sink-ability and angle of swim.
2. Disks : The use of metal or plastic discs slightly adds weight to the fly but is more often used to impact the swim of the fly, as the discs will cause a wiggle of the fly through the current, therefore causing greater disruption with hopes of eliciting a strike from a fish.
Now that all the hardware is figured out… let's tie.
TYING TUBE FLIES
Although many vise brands now make heads devoted to tube flies, you typically only require an adapter to get started. These exist in a few different designs:
- Vise Adapters
- Tapered Pins
- Flat Pins
These all have different pros and cons and I personally use each at different times depending on the type of tube or size I am using.
In this example, I use the “step down” method of a liner (1.8mm) and main tube (3.0mm).

1) Clip your main tube on an angle, making for easier joining or the two tubes.
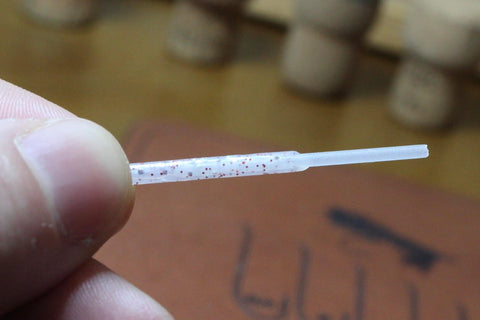
2) Slide the liner inside the larger tube. Try to not have the liner go past midway of the larger tube, as it could inhibit your ability to join the hook to the end of the 3.0mm tube (if not using junction tubing).

3) Place your tube on your adapter (in this case, a tapered needle). Heating the needle with a lighter will allow the tube to “stick”, rather than spinning, if you are experiencing this.

4) Tie your fly..
This step is not much different than a non-tube fly, aside from your fly will use more materials. The use of wax and glue is highly recommended, especially when working towards the head of the fly.
Clip off excess tubing once you are finished. Some tiers like to melt the tip of the tube, so it forms a “ridge” to keep the head from slipping off. Personally, I rarely do this as i have not had this happen when using sufficient glue, wax, and a quality head cement or UV resin. This is also the point in which you’d add a cone or disc, if needed.

5) choose a tube hook and go swing your fly!
Looking for a tube fly wallet? We have what you need!

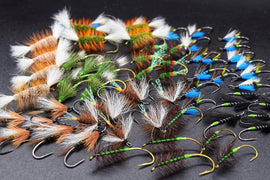
FLIES


Salmon Fly Pack - #1


Salmon Fly Pack - #2

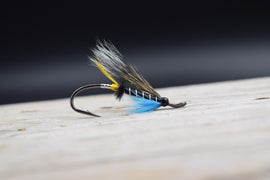
Black Silver Tip

FLY TYING


Salmon Fly Tying Leather Mat


Fly Tying Leather Mat


Heritage Fly Tying Leather Mat

